6) At the next page, click the “Continue” button.
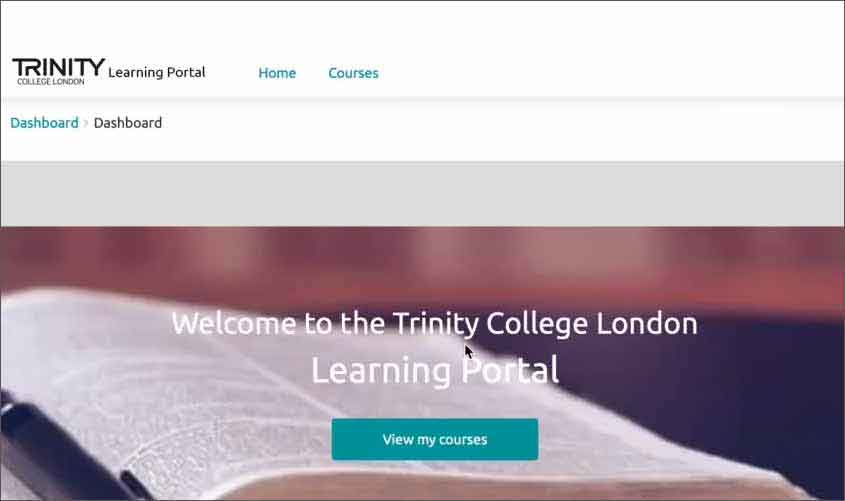
7) Now, you will be taken to the Home Page. On the Home Page, Click the “View My Courses” button.
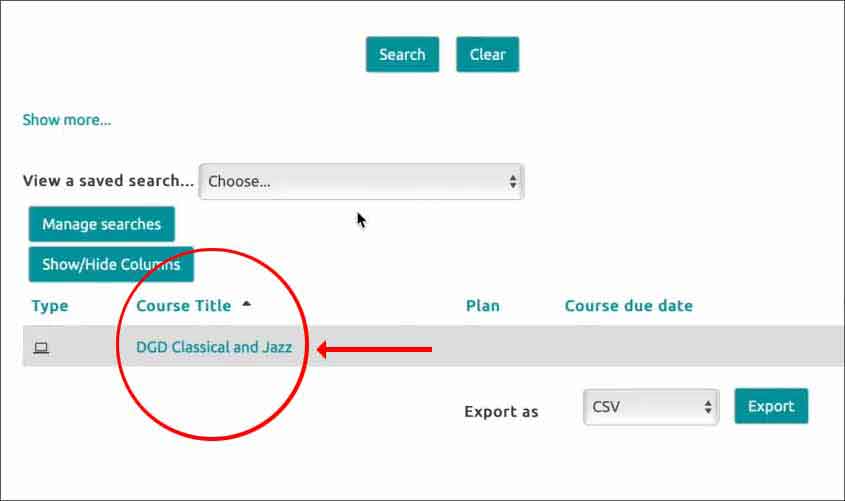
8) Now click on your ‘course name’ link, displayed under the “Course Title”. They will be named such as “DCD Classical and Jazz”, “Rock & Pop” etc., according to the course stream that you have opted earlier.
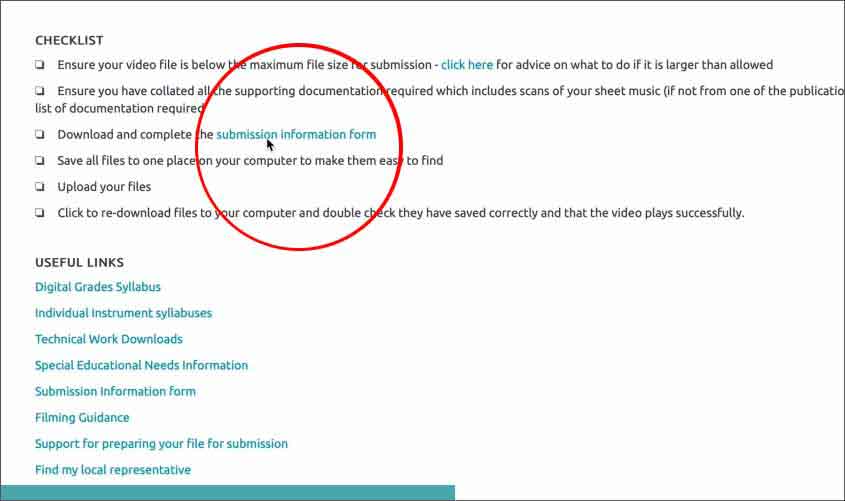
9) On the next page, check under the ‘CHECKLIST’ section to find the link to the ‘submission information form’ (in light green colour). Click on this link to download the “Submission Information Form” to your computer or phone.
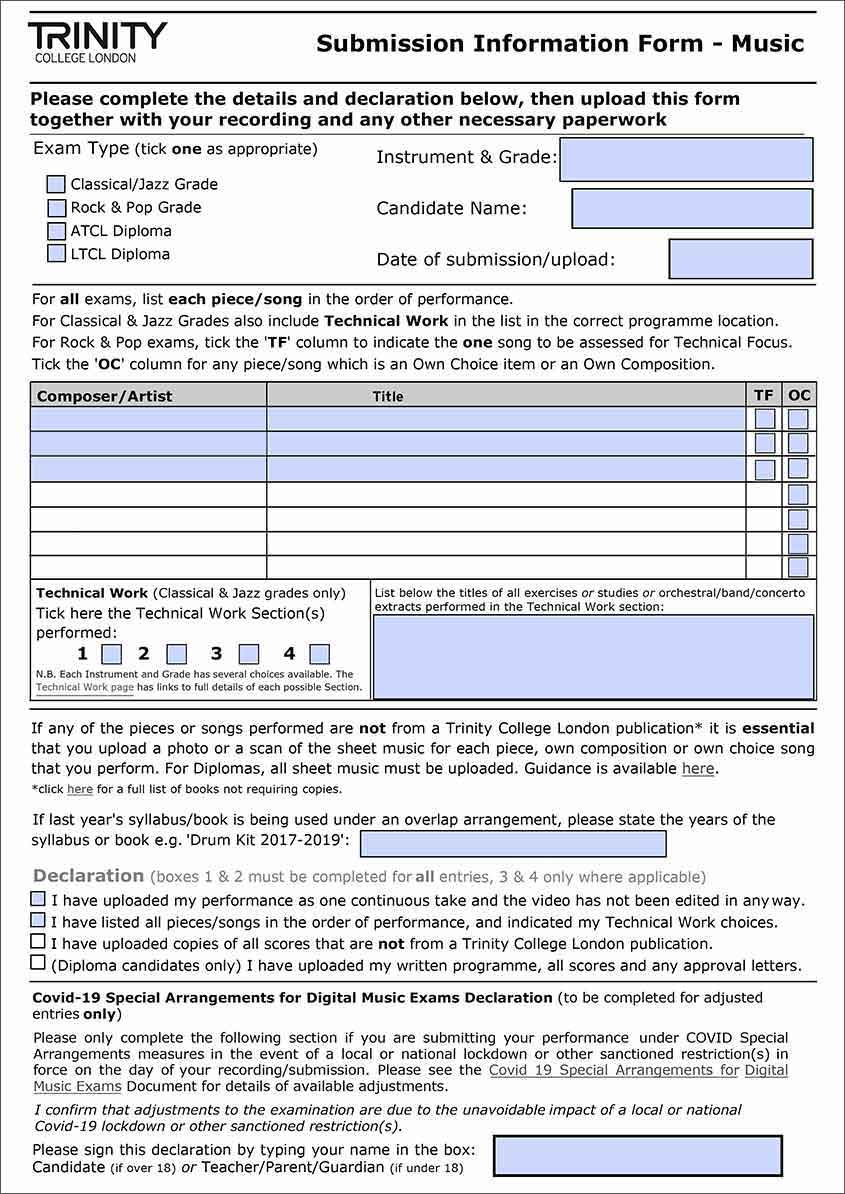
10) Go to the location where you have saved this form and click it open.
11) Start entering the relevant details in to this form (Highlighted in light purple) such as Exam Type, Grade (select from the drop-down list), Candidate Name, Candidate ID, Instrument, Date of submission/upload, Title (of the piece/song) in the order by which you are going to perform them in the video, Composer/Artist (of the respective piece/song), Technical Work (only tick the relevant technical work section(s) if you are appearing for classical or jazz grades), The Exercise Title Numbers etc. If you have doubts regarding any of these sections, you may consult your teacher or approach the Exam Centre.
You may check the Trinity Website to see the instrument specific technical work requirements for Classical and Jazz Grades.
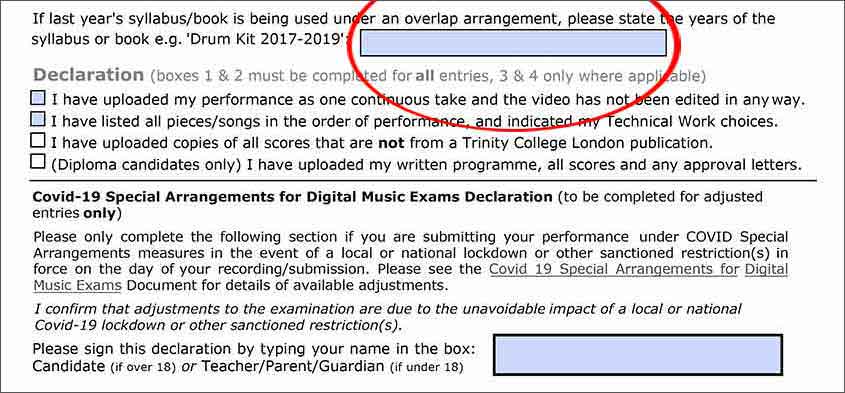
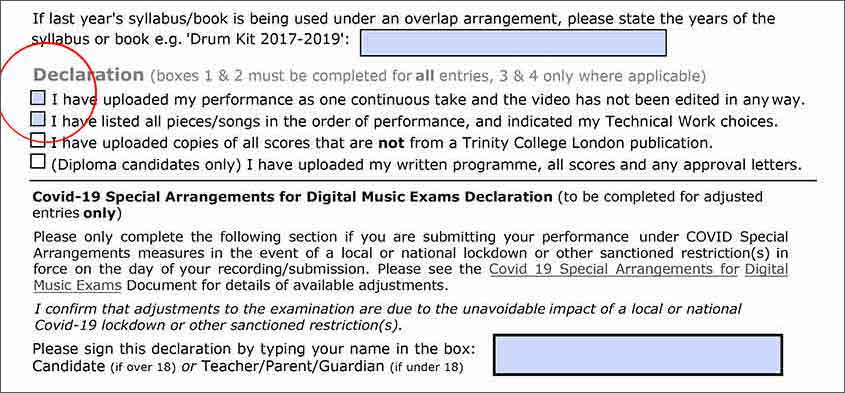
12) If a previous year’s syllabus/book is being used under an overlap arrangement, please state the years of the syllabus or book in the relevant field provided. e.g., ‘Piano 2018-2020’
13) Now, at the “Declaration” section, read & tick the 1st and 2nd Check Boxes. The 3rd check box is for candidates who are performing their own/3rd party compositions that’s not from Trinity books. The 4th check box is for Diploma candidates. Tick them only if they are applicable to you.
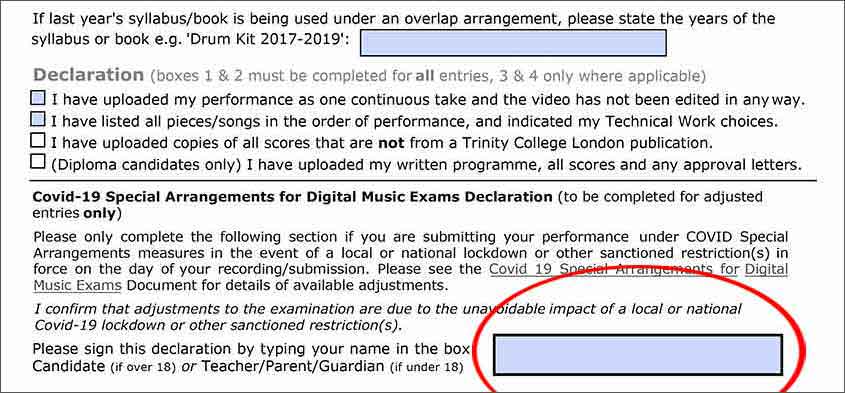
14) Write the Candidate’s Name (if above 18 years) in the “Signature/Name” area (the bottom right box). If the candidate is below 18 years, the Parent’s Name should be written instead.
15) After the form is filled duly & carefully, you may Save it and Close it.
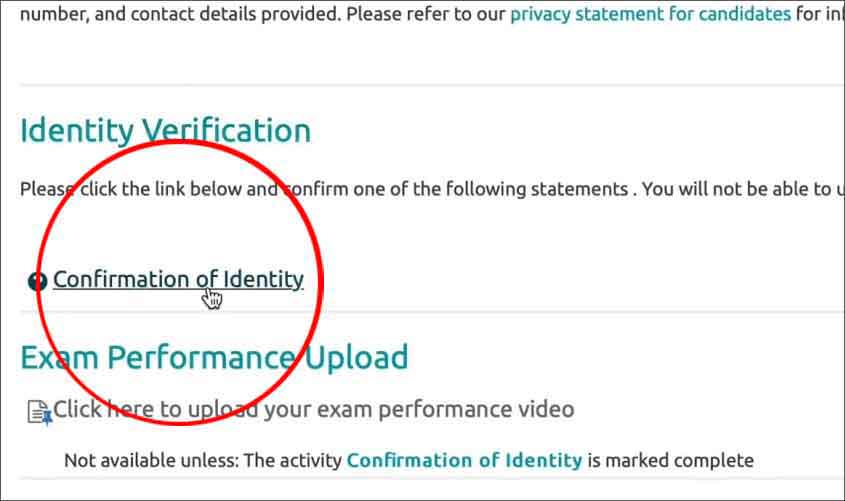
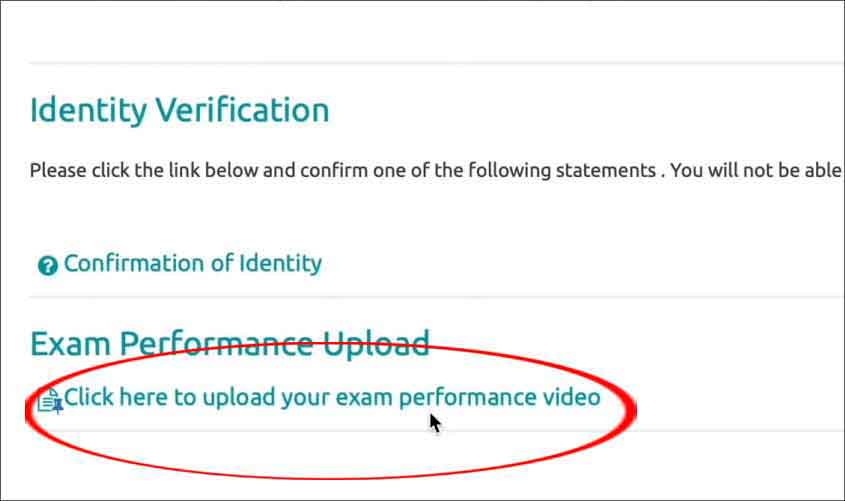
16) Go to the ‘Courses’ Page (As in step 11), scroll down to the bottom and locate the “Identity Verification” section. Click the “Confirmation of Identity” link under that section.
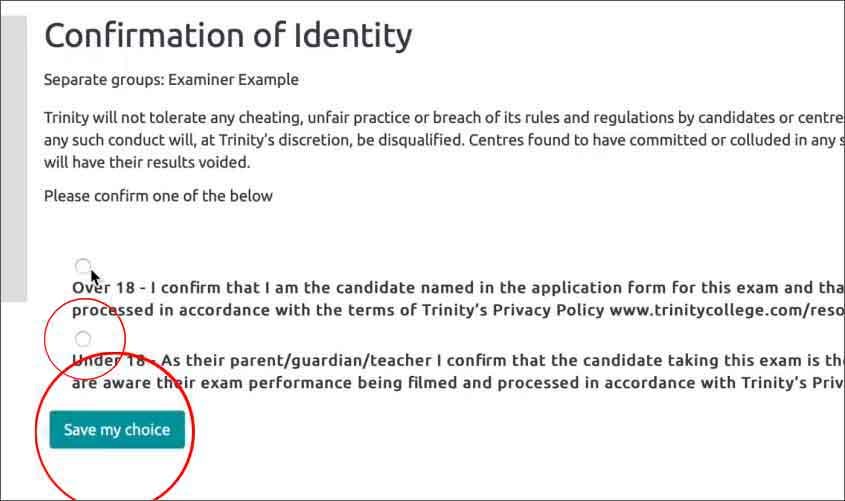
17) On the next page, choose the relevant option (Over 18 or Under 18) and click the “Save my choice” button. A message confirmation page will be displayed, showing “Your choice has been saved”.
18) Now you are ready for Recording & Uploading your performance videos. You may log out for time being to prepare for recording your videos now.
C) Recording Your Performance Video
Here are a few tips before you start recording your video:
- Always select a well-lit room, either with enough lights or with plenty of sunlight.
- Make sure that the light is falling on your face, not coming from behind you.
- Use a phone with good quality camera.
- Before recording, make sure that you check the balance between your instrument and the accompaniment/playback. You may need to move closer or further away from the camera and any microphone to achieve the perfect balance.
- Backing tracks should be played through an external speaker rather than directly from a phone or tablet. Before filming your full performance, make sure you run a soundcheck and adjust the balance between the track and your instrument or voice. You may need to move the speaker closer or further away from your camera to find the perfect balance.
- Choose a quiet room without disruptions, and remember to put devices such a phones or tablets on ‘silent’.
- All exams must be submitted as one, continuous performance (this includes all pieces/songs and technical work). If there is any evidence of editing then we will not be able to assess your exam.
- Audio and video must be recorded simultaneously and no pre- or post-production techniques should be applied.
- Your Trinity books/legally downloaded copies must be visible in the frame of the video when you film your performance.
- The maximum size for your video file is 1GB and your performance must be captured as one continuous take.
- For best results, do not hand-hold the camera! Please find a stand or tripod to mount it.
- Please remember to turn off HD settings on your device before you begin. Your videos need not be HD. You may record your video as an MP4 or MOV file.
- Frame your shot in such a way that the candidate’s face and hands are visible clearly in the shot.
- More instruments specific instructions can be downloaded from: https://www.trinitycollege.com/resource/?id=9163
- You can watch more video recording tips from Trinity here: https://www.youtube.com/watch?v=ka6VkC6b4w8
- Once you have set everything is setup, you may do a few test recordings to see if the audio & video is good enough. If any adjustments are required, you may please do so.
- Once everything is looking and sounding proper, you may get ready for the final take.
- Before you start the final recording, keep all your books ready and handy so that you are not going to waste any time between your pieces/songs.
- Once you start your recording, play each piece/song one after the other in the order you have specified in the ‘submission information form’ as in step 11. Remember, the performance of the pieces and technical work should be filmed in one continuous take, without edits.
- DO NOT PAUSE or STOP your camera till everything required for your exam is played in the proper order!
- Once everything is recorded and look and sound good; you are ready now for uploading and submitting your performance to Trinity’s Portal.
D) Uploading & Submitting Your Performance Video
19) Once you have filled-in all the details in your ‘Submission Information Form’ (Check steps 9, 10, 11 of the LOGIN & VERFICATION Section above) and recorded your performance video according to the section above, you are ready for uploading & submitting your Exam Performance to Trinity.
20) Go to the ‘Courses’ Page (As in step 11), scroll down to the extreme bottom and locate the “Exam Performance Upload” section. Click the “Click here upload your exam performance video” link under that section.
21) On the next page, Click the green “Add Submission” button.
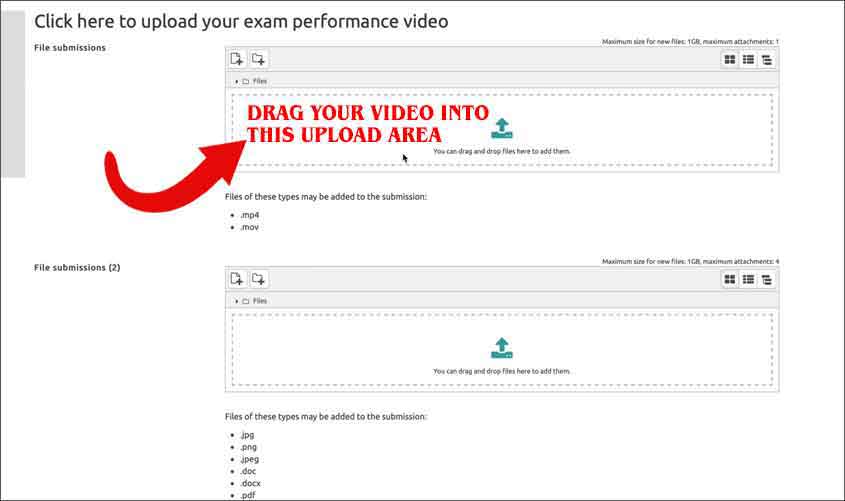
22) In the next page, you will see two file submission windows. You can drag & drop your performance video file into the top (first) window (in .mp4 or .mov format with less than 1 GB file size). Please wait till the file is completely uploaded and appears in the same windows as a file icon.
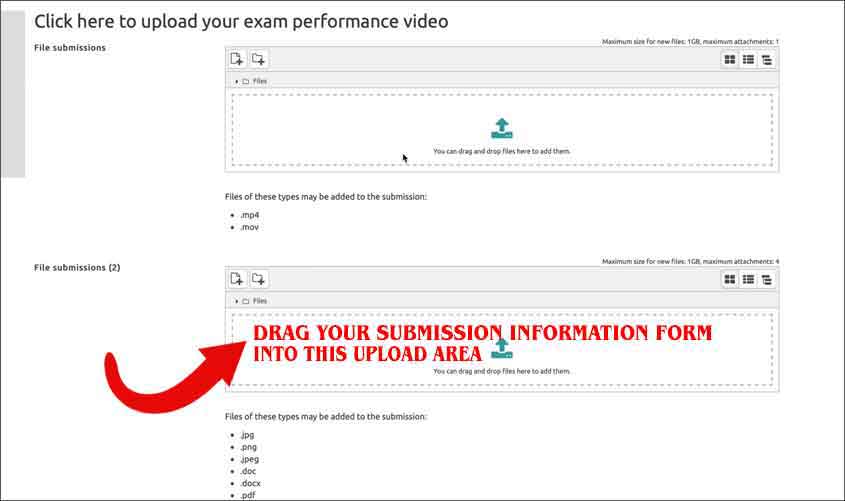
23) Now, you can drag & drop your ‘Submission Information Form’ into the second window. Please wait till the file is completely uploaded and appears in the same windows as a file icon.
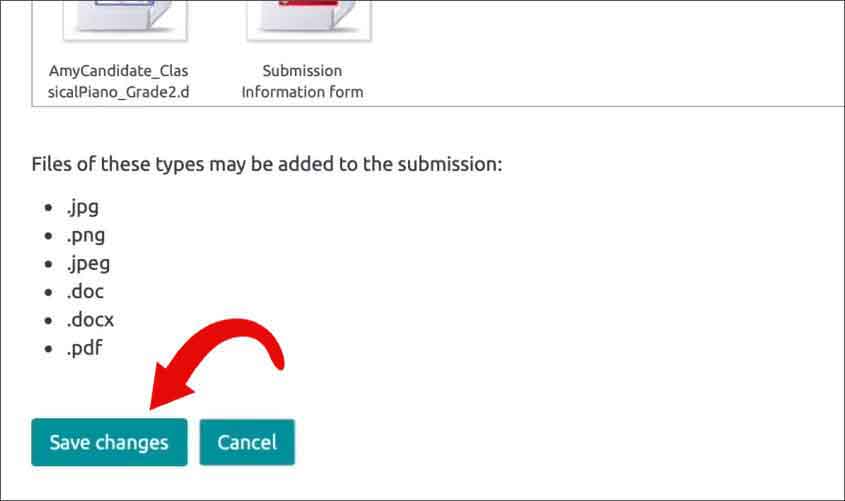
24) Now, go to the bottom of the page and click the green “Save Changes” button.
25) Your submission details will be displayed in the next page.
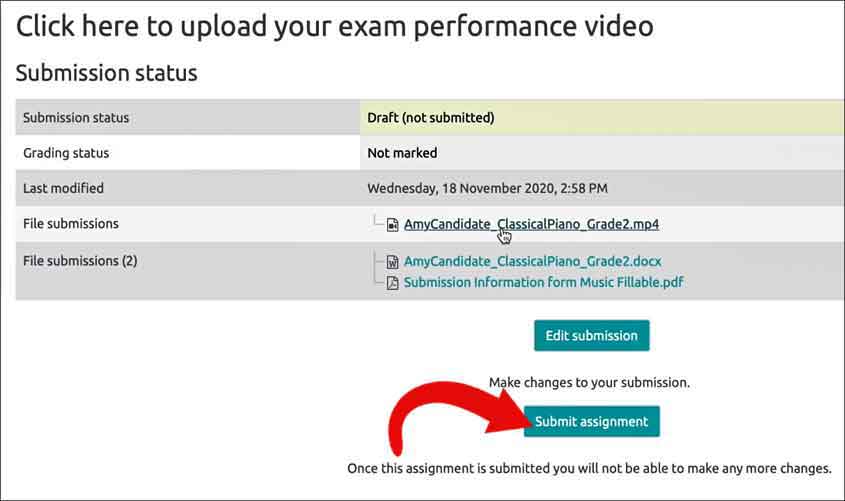
26) From this page, if needed, you can re-download your files to check for any errors. This step is recommended, since you will not be able to make anymore changes to your assignment after it’s submitted. Open & play the re-downloaded files to check for any errors and confirm that the video is playing successfully.
27) Once you have checked everything and is assured that everything is uploaded correctly, you may do your FINAL SUBMISSION by clicking the green “Submit assignment” button.
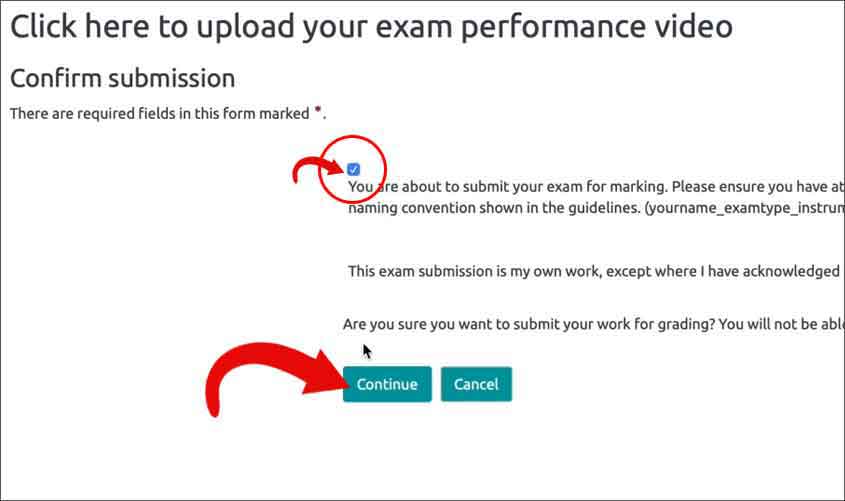
28) A Submission Confirmation page will pop up. Read the instructions carefully, tick the small declaration check-box to confirm your submission and click “Continue”.
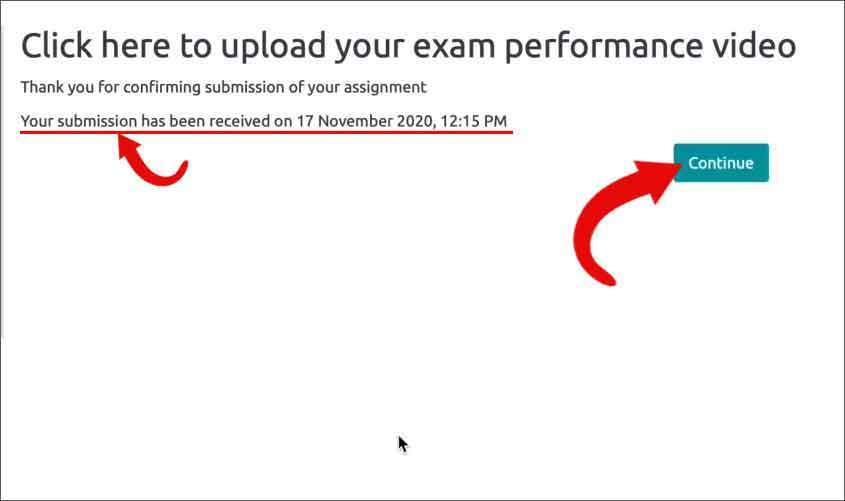
29) A Confirmation page will pop up, stating that ‘Your submission has been received on….”. Click ‘Continue‘ and you may go back to the home page or log out now.